
Disclosure: This post contains affiliate links and I may be compensated if you make a purchase after clicking through one of my links.

All of the components for the object avoidance robot with the exception of the cover are available through Amazon. The complete robot project instructions are presented in posts one through ten. The component list for this robot is given below along with my opinion of the best ones to use.
<----- Click to go to Amazon and search for parts
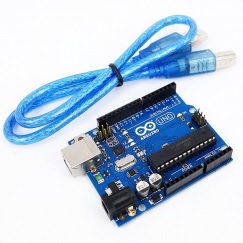
Arduino UNO R3 controller board:
The Arduino Uno is a microcontroller board based on the ATmega328. It has 14 digital input/output pins (of which 6 can be used as PWM outputs), 6 analog inputs, a 16 MHz crystal oscillator, a USB connection, a power jack, an ICSP header, and a reset button. It contains everything needed to support the microcontroller; simply connect it to a computer with a USB cable or power it with an AC-to-DC adapter or battery to get started. Revision 3 of the board has the following new features: 1.0 pinout: added SDA and SCL pins that are near to the AREF pin and two other new pins placed near to the RESET pin, the IOREF that allow the shields to adapt to the voltage provided from the board.
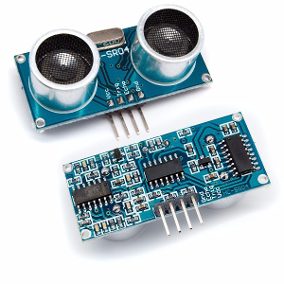
Ultrasonic proximity board:
The HC-SR04 ultrasonic sensor uses polarized ceramic technology to provide non-contact range detection from 2cm to 400 cm or 1” to 13 feet. Using ultrasonic ranging eliminates errors caused by light and color variations that could otherwise distort readings.
**Specifications**
Power Supply :+5V DC
Quiescent Current : <2mA
Working Current: 15mA
Effectual Angle: <15°
Ranging Distance : 2cm – 400 cm/1″ – 13ft
Resolution : 0.3 cm
Measuring Angle: 30 degree
Trigger Input Pulse width: 10uS
Dimension: 45mm x 20mm x 15mm
Connect Pins
+5VDC
Trig:Trigger(Input)
Echo:Echo(Output)
GND:GND
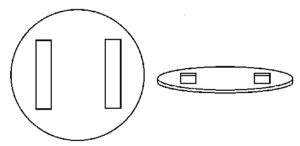
Base: The base can be made from any number of materials. It is my opinion that 1/8" plexiglass works best. This material is easy to cut, drill, and sand.
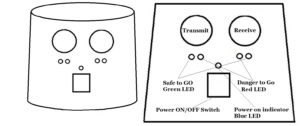
Housing: There are several preformed plastic containers that work well for a cover. A couple of examples would be a large butter tub or cottage cheese container.
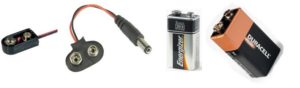

9 volt battery w/ cable: Any high quality standard 9 volt battery will work fine. As far as the battery cable goes, again in my opinion, a soft plastic connector is preferable over a hard plastic type.
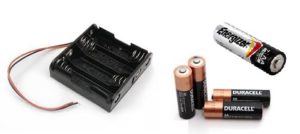

four AA batteries w/holder: Any high quality AA cells are o.k. You need to make sure that the battery holder connects the cells in series to provide 6 volts.
Two continuous rotation servo motors: Listed below are four different servo motors with a few of their specifications. The Robot is small and light so the ones listed should work o.k. They must be modified into continuous rotating servos as shown in the video in the post about continuous rotation servos.
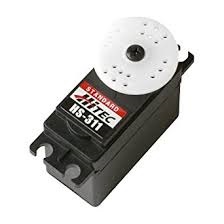

HS-311 Servo Motor
A = .780” (19.82mm)
B = .530” (13.47mm)
C = 1.33” (33.79mm)
D = .400” (10.17mm)
E = .380” (9.66mm)
F = 1.19” (30.22mm)
G = .460” (11.68mm)
H = 1.05” (26.67mm)
J = 2.08” (52.84mm)
K = .368” (9.35mm)
L = .172” (4.38mm)
M = 1.57” (39.88mm)
X = .120” (3.05mm)
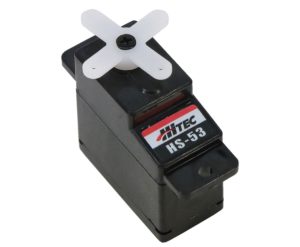

HS-53 Feather Nylon Gear Servo Motor
Features: • Ideal for micro planes, and hand launch gliders • High impact nylon gears • Coreless motor
Includes: • HS53 Servo with 0.67" (17mm) 4-point Horn, 1.2" (31mm) Double Arm Horn and two Mounting Screws
Specs: • 4.8V 6V • Speed: 0.14 sec/60° 0.11 sec/60° • Output Torque: 1.5kg/cm (20.94oz/in) 1.9kg/cm (26.53oz/in) • Weight: 8g (0.28oz) • Size: 0.89 x 0.45 x 0.89" (22.8 x 11.6 x 22.6mm)
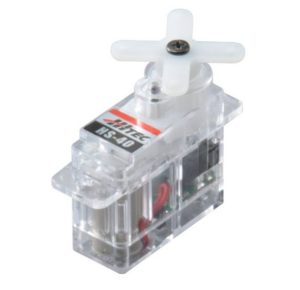

HS-40 Nano Nylon Gear Servo Motor
Servo motor with resilient nylon gears Speed (4.8V/6.0V): 0.12/0.10 Torque (4.8V/6.0V): 8.4/10.5 oz./in., 0.6/0.75 kg./cm. Motor type: 3 Pole
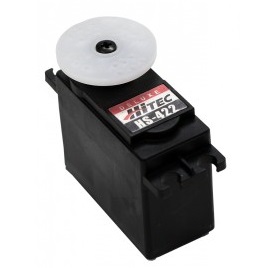
HS-422 Servo Motor
Speed (sec/60o): 0.16
Torque (Kg-cm/Oz-in): 4.1/57
Size (mm): 41 x 20 x 37
Weight (g/oz): 45.5/1.6
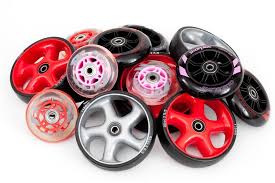
Two wheels: There are a couple of important things that need to consider when purchasing the wheels for the two wheel robot. First, they need to fit directly on the shaft of the servos. Second, the wheel radius needs to be such that they will extend an appropriate distance through the base to accommodate the height of the bottle caps being used to control the rocking of the base.
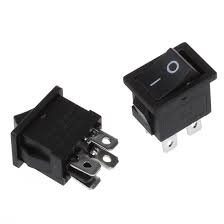
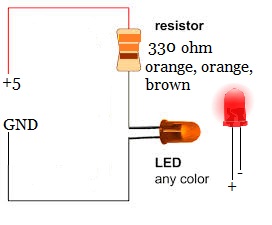
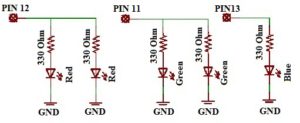
DPST switch, five LEDs, five 330 Ohm ¼ watt resistors: A double pole single throw rectangular chassis mount rocker switch is recommended for the Arduino object avoidance robot,although virtually any other DPST switch would do the job.
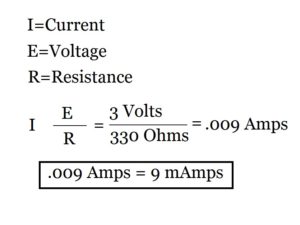
When the Arduino turns on one of the LEDs approximately three volts appears across the associated resistor. The current flowing through the circuit is subject to OHM's law. So the current equals voltage (3 volts) divided by resistance (330 ohms) which shows the current to be approximately 9 milliamps.
Generally the maximum LED current rating is 20 mAmps. So in this case, we are well below the max.mWatts. The wattage rating of the resistors (using standard values) for the Arduino robot can be as limit. The Power being dissipated by the resistor equals current times voltage (.009 x 3 volts) or 27 little as .1 watt. I recommend 1/4 watt resistors just because the leads work better in the proto-board. Carbon film resistors can be used and resistance tolerance rating of 5 or even 10% is fine.
Double sided foam tape, hot glue, paint, and misc.
Go to Amazon for any or all materials to build your projects.
shopping for almost anything