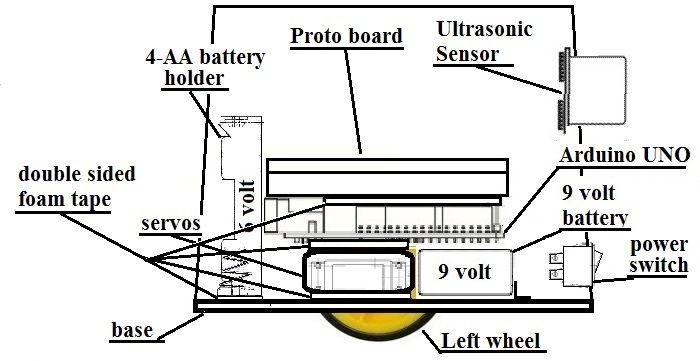
Since a picture is worth a thousand words, the assembly of the two-wheel ultrasonic object avoidance robot is pretty well explained by the above cutaway drawing. The first step is to mount the two servos using double-sided foam tape, making sure that the axles are properly aligned with the wheel slots. Next comes mounting the Arduino uno controller again using the double-sided foam tape. The final layer is the protoboard which allows for easier wiring, component addition and experimentation of other applications. For a little extra fun, let’s add a couple of LEDs to light up blue normally and change to red when an object is in the travel path. I guess that while we are at it we can add a green LED for a power on indicator.
The wheels need to be installed. Then, by setting the robot on a flat surface, you can observe (depending on the wheel size) how much of a teeter-totter effect is present. This must be nullified. To do so, you need to take two plastic soda bottle caps, cut them to the appropriate height and hot glue them as shown drawings below. A small amount of teeter-totter needs to be allowed so the wheels can get traction.


 The plastic cover needs holes cut to accommodate the mounting of the on/off switch and ultrasonic sensor. Now that we have added five more LEDs, holes need to be cut for those. Once the cover components have been mounted the wiring can be done and programming can start.


